|
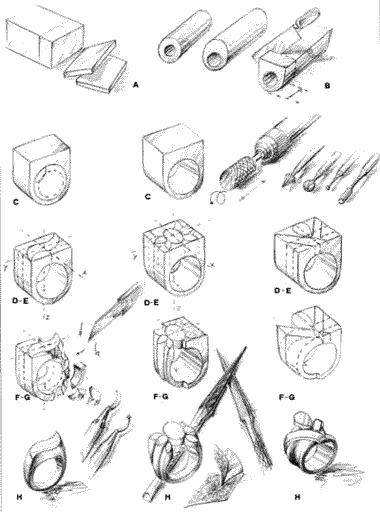
If we want to create a model directly in melting wax, it's possible by using semimanufactures in hard wax (dis. A), that one can find on the market in blocks or in plates of different sizes for various objects and in semimanufactures for rings. These are available in tubular, elliptical and semitubular sections with a flat part. For the realization of a ring in wax, detatch with the small saw a section that can contain the volume of the object (dis. ), bring the hole to the size desired (dis. C), with the help of a half round file, or with the drill provided of a cylindrical cutter or by hand with cutter to countersink. Then mark the middle points along the border of the ring (dis. D), so that the design of the ring is transfered in a symmetric way (dis. E), then mark the vertical centre of the ring both on the top part and on the low part of the stem (Axes Y,X,Z see project of a ring dis. 3 A7 in 18 Kt n 27). Once this is done and everything is checked, the vertical contour material in excess will be taken away (dis. F), this hasn't anything to do with the design. Sketched out the contour of the head, the lateral excess on the stem will be taken away (dis. G), and once the symmetry is checked the excess of the inclined planes will be removed (dis. H). In this phase, those half edges that obstruct the smooth connection of all the forms and volumes according to the design, can be removed. In the end with some emery paper the object can be levigated by smoothing it all. The electric stick can be used, to join together, add , or repair the broken parts. This is warmed with an electric resistance or the point of
|
|
 |
|
|